|

A
Short Introduction to the Pinhole Camera by Christopher John Ball.
|
|  |
In
this day of digital perfection and software correction the 'Pin-hole'
camera is a breath of fresh air and a superb tool to consider
using on your next photographic assignment. It is one of the simplest
pieces of image making equipment on offer to the serious artist
and its unique aesthetic lends itself perfectly to the creation
of erotic imagery. Often home-made - this camera doesn't use a
glass lenses but, as its name suggests, instead produces an image
via a very small, sharp-edged hole in a thin opaque material such
as brass sheet or shim.
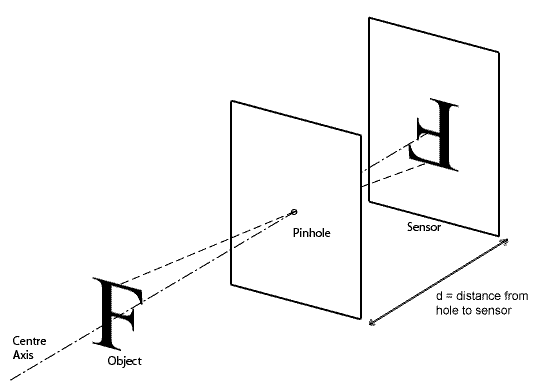
This hole produces an image upon the film plane that varies, in
both scale and perspective, according to the distance between
the pin-lens and the sensitive surface. If this distance is short
the image produced is similar to that of a wide-angle lens. Increasing
the distance results in a telephoto, or long-focus, lens effect.
Another quality that often draws photographers to the use of a
pinhole camera is the infinite depth of field displayed within
the resultant image.
The principle of the pinhole camera is older than photography
itself and was often used in early camera obscura.
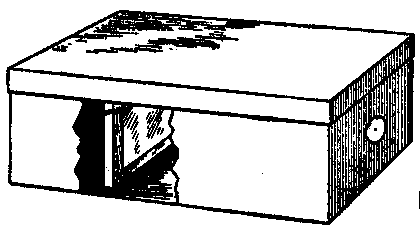
Pinhole camera's vary in construction from the simple cardboard
'shoe-box' example one associates with a school science class
to professionally built scientific apparatus made out of wood
or metal. Conventional camera's, such as 35mm SLR or 5 x 4 sheet
film monorails, can be adapted to take a pinhole lens and these
often produce excellent results. In the case of a 35mm SLR one
has only to adapt a body cap to hold the pin-hole and away you
go. You can also use this method on a digital SLR but be careful
- given the pin-holes 'depth of field/focus' etc - any dust on
your camera sensor shows up sharply.
The quality of the image produced by a pinhole camera depends
upon the size, sharpness and quality of the hole. This quality,
up to a point, improves as the hole is made smaller, but beyond
a certain size it deteriorates rapidly. This is because of diffraction.
The combination of highest image quality and minimum diffraction
is described as the optimum pinhole diameter. The formula for
determining this can be found within these pages.
The ' shutter ' on a pinhole camera can vary from a simple hinged
flap of wood or card, placed in front of the pinhole, to a field
camera shutter taken from a broken lens. As the exposure times
are typically in 10's of seconds, and even minutes and hours,
either method can be used with complete confidence.
It is even possible to use a camera made with multiple pinholes
so as to create photographs with rows of multiple images on one
plate. The aim is to experiment and, above all, have fun.
Making
the pinhole.
It
is worth taking time and care over the making of the pinhole.
It should be a clean, sharp-edged hole, with no burr, and prepared
from a material with as little depth as possible. In schools silver,
or aluminium, foil is often used. For a more robust pinhole lens
it is recommended that a material such as brass shim, or sheet,
be used.
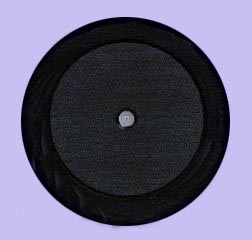
A piece of brass sheet, about 1/32 inch thick, is cut to fit the
base or carrier. Use a nail to ' TAP ' a dimple-like raise in
the centre. Take care not to make a hole in the sheet.
Use a piece of fine abrasive emery, or wet and dry, paper to smooth
the raised side of the dimple. Now, using a needle of suitable
diameter, and working from the depressed, or concave, side of
the dimple, pierce a hole. Use the fine abrasive paper to remove
any burr, it may help to use a photographic loupe or watchmaker's
glass to check. Pass the needle through the hole again.
The final stage is to blacken the brass. The time-honoured method
is to place the brass over a candle flame. Check that no ash has
blocked the hole.
For greater accuracy, it is possible to purchase pinholes, either
ready made or to order, cut by laser.
Formulae
for producing the optimum pinhole diameter.
In
order to minimize the effect of diffraction and therefore achieve
an image of maximum definition the diameter of the pinhole show
be based upon the following formula:
d
= square root of (0.0016F) |
Where
d is the pinhole diameter and F is the focal length. |
To put it another way, for a given pinhole you should construct
a camera that has a focal length derived from the following formula:
F
= 625(d squared) |
Where
d is the pinhole diameter and F is the focal length. |
As stated, the quality of the pinhole image depends
upon the size and sharpness of the hole. The definition produced
by any given pinhole is determined by the size of the image
patch corresponding to a point object. The diameter of the image
patch formed by the rays of light from a point source is given
by the following formula :
Where
D = the diameter of the image patch, d = diameter of the pinhole,
u = the distance of the object from the pinhole and v = the distance
of the image from the pinhole. Therefore if the distance of the
object from the pinhole, ( u ), is greater than the image from
the pinhole, ( v ), even a large pinhole will give a reasonably
sharp image. A pinhole of about 1/64 inch diameter will be found
satisfactory for normal photography with a pinhole to image distance
of up to 6 inch.
Formulae
for determining the optimum exposure for any given pinhole diameter.
The
exposure depends upon the size of the pinhole and its distance
from the film plate, i.e. its f-value. This is calculated exactly
as with any other lens. A 1/64 inch pinhole 10 inch from the film
plate will have an f-value of :
One
factor to take into account whilst determining the correct exposure
is ' reciprocity failure '.Photochemical theory states that,
providing the exposure ( light intensity x time ) remains constant,
the photographic emulsion should respond in a consistent manner.
For example, an exposure of f11 at 1/500 second should produce
the same density of negative as an exposure of f5.6 at 1/2000
second.In the field, photographic emulsions, when working at
the extremes of exposure i.e. very long or short exposure times,
do not adhere to this law. This is known as reciprocity failure.As
exposures required, when practicing photography via the pinhole
camera, tend to be very long, reciprocity failure has to be
taken into account.In order to compensate for this effect it
is possible to use the table below.
Indicated
exposure x Compensation factor = Adjusted exposure |
1
second x 1.25 = 1.25 second |
5
second x 1.50 = 7.50 second |
15
second x 2.00 = 30 second |
45
second x 2.50 = 1.52 second |
2
minutes x 3.00 = 6 minutes |
5
minutes x 4.00 = 20 minutes |
10
minutes x 5.00 = 50 minutes |
20
minutes x 6.00 = 120 minutes |
40
minutes x 8.00 = 320 minutes |
July 2024 Several books, featuring Christopher John Ball's photographs, are now available through Amazon or click on an image below to purchase via secure payments on lulu.com
Return
to Articles Contents
|